Smart Circuit Training
Circuit training is the method of endless possibilities! Coach Sarah Walls shares a workout that checks all the boxes you want in an effective circuit: challenge, variety, effectiveness, and intelligent planning.

An athlete’s ability to repeatedly produce high amounts of power - and then recovery quickly to do it again (and again… and again…) is the definition of fitness for team sports.
Lately I’ve been working with an athlete rehabbing from a lower body injury who needs to keep her cardiovascular conditioning and fitness as high as possible. It’s been a great challenge and has gotten me utilizing some methods and equipment I don’t regularly utilize.
Circuit training, in particular, has been crucial.
It’s really important to keep training, even with an injury, you just have to be smart about it. Otherwise, the athlete will come back from injury only to find themselves woefully out of shape - which can lead to a new injury simply from fatigue when they try to pick up their sport again.
There are truly unlimited possibilities when it comes to circuit training. A basic understanding of what you want to get out of the session should help guide some decent decision making. Always be sure to factor in some rest time and/or active recovery.
I’m also a big supporter of self-regulation. If your body says it needs to go slower or rest, then give it what it needs! We always want to train with the intent to “live to fight another day”. There will be another workout to push to your limit.
Here is a circuit that I designed for myself that focused on repeated efforts of maximum power with active recovery. All active recovery exercises were chosen for my specific injury prevention needs:
Explosive Belt Squat x5
*Scap Pull-up x10
Explosive Lat Pulldown x5
*Heel Raise x10
MB Keg Toss x5
*Full cans/Empty cans x10
Explosive Push/Pull x2/way
*Elliptical x:60
Active recovery exercises indicated with the asterisk and italics.
I was able to monitor power output on a rep-by-rep basis throughout the session, but if you want to give this a try and do not have access to that type of feedback just simply do each of the main exercises with as much speed/force as you can generate for every single repetition.
Let me warn you: the above is not for the faint of heart. The repeated focus on power was a real difference maker. Be smart with the amount of total time you want to work. This session was done for 7 rounds and that took around 45-minutes. It was exhausting. Like impacts-the-rest-of-your-day exhausting. I suggest targeting 20-minutes or so for your first time.
Feel free to substitute your own exercises for the active recovery choices. If there’s a chink in your armour, this is the perfect opportunity to know your staying fit and pushing yourself with exercises that are safe for you, while also getting the extra reps on your prehab/rehab exercises.
Since you’re here: We have a small favor to ask! At SAPT, we are committed to sharing quality information that is both entertaining and compelling to help build better athletes. Please take a moment to share the articles on social media, engage us authors with questions and comments below, and link to articles when appropriate if you have a blog or participate on forums of related topics.
Thank you! SAPT
Press Reset Today
Taking time to briefly set and reflect on your personal goals can go a long way in actually achieving them. Coach Sarah Walls shares an easy 3-step process for making this as automatic as possible.
I once worked for someone who savored Daylight Savings Time in the spring when he could move his clocks forward an hour and be given a “free” hour. I’m not sure why, but the meaning he got from that one extra hour has always stuck with me. I think we all enjoy getting that extra hour added to our day, but c’mon, this is the thing you look forward to every year?
Well, apparently, this was an extremely important day for him. He explained to me that it made him feel like he was able to operate within his day more well rested and with lots of time to spare. In just that one hour he felt he was able to reset (and reorganize) his life.
Today is Labor Day and most of us have the great fortune of having a day off from work. It’s traditional to have a barbeque and visit the pool one last time. Of course, while we’re all anticipating the shift from summer to fall and quickly into winter, it’s worthwhile to reflect on the status of your work and non-work lives.
The origin of Labor Day stems from the need to help workers get more time off from their jobs. When this concept was introduced, it was commonplace for factory workers to put in 70 hours a week.
Like many areas of life, I find I must diligently continue to prune ineffective uses of my time to help me maintain a reasonable balance between my work life and my home life and to ensure I’m still on track for my immediate and long-term goals.
Days like today are perfect for taking a stepback, doing some introspective thinking, and pressing the reset button on your life.
Here is an easy 3 step process that will help you maximize today for the benefit of your future:
Set/check goals: what are you working towards?
Get organized: what systems need to be in place for you to be successful? Or rather, to make success more automatic? Automatic success sounds good doesn’t it? Well, get organized.
Execute: once you have your systems defined, it just becomes a matter of execution.
I’ll give you a couple examples of some simple processes I put in place over the past year that help automatically keep me working towards my long-term goals:
Example #1: More Time with My Family
Step 1 - Set the Goal: Not coaching during hours when my children are not in school. So, this means evenings and weekends.
Step 2 - Get Organized: Make sure the SAPT coaches are fully trained and ready to run the show for sessions.
Step 3 - Execute: If the first two steps are done correctly, step 3 becomes a piece of cake. In this case, it’s been almost a year since moving to this system and it has had an enormously positive impact on my home life. Plus, the coaches continue to get the experience they need as they develop.
Example #2: Financial Diversification
Step 1 - Set the Goal: Amplify my savings plan and future returns.
Step 2 - Get Organized: Set up my investment account for automatic purchases each month.
Step 3 - Execute: This is about as automatic as it gets.
I’m sure you’re not here for my basic thoughts on how I am managing my home and financial life. So, what about making your health and fitness automatic? Well, it’s truly easier than you may think, but you need to press the reset button and really think about goals.
Improving your overall health
Step 1 - Set the Goal: what, specifically, do you want to measure? In my examples above I measure hours at home and returns on my investments. To be successful, you MUST measure something specific!

Take a good, hard look at yourself and the direction you’re currently heading.
This can really be anything, but it must be meaningful to YOU.
Common measurables in the health category include: blood pressure, cholesterol, weight, body fat, and even something like servings of vegetables in a day. All of these will work, but only pick one (of define another that is important to you).
Step 2 - Get Organized: Overall health improvement almost always depends upon foundational habits. So, making sure you are feeding yourself nutritious meals at each meal, every day and ensuring you get at least 30-min of easy aerobic exercise daily (an evening walk will do the trick nicely).
How do you make those things happen? Meal prep on Sundays for the week leads to easy grab ‘n go for meals and setting an alarm for that evening walk are just a couple of ideas.
Step 3 - Execute: Time to put rubber to the road and follow your plan. Of course, if you feel you are lacking the proper knowledge or support to achieve your goal, hiring someone to guide and support you in this journey is always a very good idea.
Improving fitness or hitting a new strength record will require a different 3-steps, but in each case it is critically important that you choose meaningful goals that contribute to the things in your life that matter most.
One final note: plans often go astray. But continuing to take days like today to reassess and even reset will eventually, as haphazard as it may seem, get you further than if you had no goals and no plans.
Since you’re here: We have a small favor to ask! At SAPT, we are committed to sharing quality information that is both entertaining and compelling to help build better athletes. Please take a moment to share the articles on social media, engage us authors with questions and comments below, and link to articles when appropriate if you have a blog or participate on forums of related topics.
Thank you! SAPT
Developing Strength & Power in Young Athletes: Youth Speed Training Workout #002
Coach Sarah Walls shares another new developmental speed training session for children that is built around fun, coordination, strength, and speed.
In addition to speed and agility development, young athletes need to be allowed to develop musculoskeletal systems that are sufficiently robust to tolerate the repetitive impact forces commonly experienced during aerobic or anaerobic endurance activity. - High-Performance Training for Sports
In a nutshell, that’s strength training, y’all. In another nutshell, that quote also tells you EXACTLY why so many kids get injuries playing sports. You have GOT to get resistance training in the mix!
Below is a single session example workout that I used with my 9-year old daughter that provides lots of opportunities to work on change of direction, coordination, strength, and speed training technique. This session is scalable and appropriate for children in the 9-11 year old range who have adequate physical and psychological readiness:
Football Toss & Form Shooting 5-min
MB Side Throw 2x5/side
Hang 2x:15
Carry 2x1 trip
Alternating Side Shuffle 2x15yd
Side Shuffle 2x15yd
Overhead MB March 2x15yd
Overhead MB A-Skip 2x15yd
Overhead MB A-Run 2x15yd
Side Shuffle to Sprint 2x/side
Side Shuffle to Backpedal 2x/side
Side Shuffle to Backpedal to Sprint 2x/side
A1 BW Split Squat 3x6/leg
A2 Pogo Hops 3x5
B1 Band Assisted Chin-up 3x3
B2 Hands Elevated Push-up 3x6-8
C1 Trap Bar Deadlift 3x3
C2 Box Jump 3x3
Hang Snatch Technique 3x3
Below is a transcript from a recording on my thoughts behind this session:
“It's really important that fun is in almost every part of a kid's workout. Even If each movement isn't all that fun, The fact that you're just laughing and making time for a little bit of fooling around and joking is very, very important to long term adherence to a training plan. Right now, For my nine year old, she is in the Learn to Train phase of her development, which means that everything we're doing revolves around setting the foundation for later on when she's old enough to push a bit harder, be it with her focus, or the weights that she's using, or the intensity overall, whatever it is that we might be pushing. But right now, we're just learning about all those things and learning about consistency and learning how to move well.
For this session, we started off with a football toss and some form shooting for about five minutes. This was us just having fun and and throwing a football. Then we went into form shooting for basketball, and did that for a couple minutes.
Next we started a warm-up circuit that I like to use, which involves a throw of some kind, hanging for time, and a loaded carry variation.
For children who are not involved in a sport focused heavily on rotational power (baseball/softball and golf, as examples), it can be really tough to get enough “reps” and learn the technique. Rotational power is important for all athletes, but it’s complex for those who haven’t done it much in a controlled environment. As such, I've been putting transverse plane activity in pretty regularly so that they can eventually getting the hang of the sequencing. I think right now it's kind of a complex task for both of them.
That the hanging works on static grip and upper body strength; the carry, as well, is his grip strength and total body strength.
Then we go into an alternating side shuffle, and a regular standard side shuffle. This is more just to help them sequence the movement patterns and smooth it out over time.
From there, we went into an overhead medicine ball march, then the A-skip, and finally the A-run. These are similar to the overhead positions that we've done in the past for form running. And also on the front, front rack position with the dowel rod. The medicine ball is heavier, so it's more challenging.
Next we tried some transitions: side shuffle that transitioned into a sprint, side shuffle that transitioned into a backpedal, and side shuffle to backpedal to sprint. The purpose here is to get practice of changing from one task to the next.
For the resistance training portion, I start with the body weight split squat. I really like this as the primary movement for my daughter, in particular, because she's growing so fast. I paired this with Pogo hops for the purpose of Achilles tendon durability and to train the stiffness required for effective jumping.
A new movement for today was the band assisted chin-up. This was a big deal for all of us! From my perspective, I have to trust that a child is strong enough to hold their own body weight for around 20 seconds before we attempt a vertical pull. From the child’s perspective, it can feel like a mega accomplish that comes second to none.
The chin-up was paired with a hands elevated push-up. One note on the push up, you have to teach proper hip position and you have to teach the kids to know what it feels like to brace and move through a push-up before you can expect them to consecutive do push-ups.
We finished with trap bar deadlift and box jumps. The deadlift is looking really good now (meaning my daughter has reliable positioning and can receive coaching cues as needed), so I think we will start progressing it slowly with volume and load. The goal with box jumping was to land quietly while perfecting takeoff and landing form.
Off-the-cuff, I decided to check out her hang snatch with the technique bar (instead of a dowel rod) and it looked really amazing. This was a pretty major milestone, as her strength and stability is sufficient to begin working on this movement pattern.”

The catch position for the snatch requires overhead strength and ability to stabilize the whole body.
Teaching children to train, and build a foundation for a lifetime, requires a positive environment, a variety of exercises, and a lot of flexibility.
Since you’re here: We have a small favor to ask! At SAPT, we are committed to sharing quality information that is both entertaining and compelling to help build better athletes. Please take a moment to share the articles on social media, engage us authors with questions and comments below, and link to articles when appropriate if you have a blog or participate on forums of related topics.
Thank you! SAPT
My Hip Hurts! Training with a Hip Labral Tear, Part 1
So your hip hurts? The good news is there are always safe workarounds in the case of injury or lingering issues. Coach Sarah Walls begins her two part series on understanding how to apply safe training to the lower body with a labral tear in the hip.
So your hip hurts? I’m sorry to hear that - mine does, too! The good news is there are always safe workarounds in the case of injury or lingering issues (that should be accounted for as they always add up to real injuries down the road).
If you’d like to learn about the “why” behind some hip trouble, check out: "My Hip Hurts!" Training Around Femoroacetabular Impingement
Today, we’re just going to start talking more specifically about solutions for hip impingement - often felt as a pinching or dull ache - and often resulting in hip labral damage (there is a wide variety here).
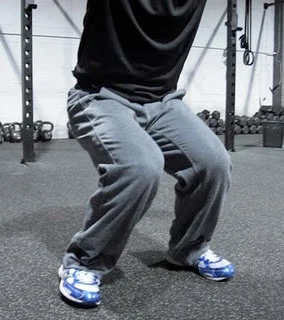
It’s a pretty good rule of thumb that squatting is either not recommended or recommended to be heavily modified for athletes who are having hip labrum issues. This is because of the high degree of hip flexion during the squat - or where the knees come closer to the chest - can cause some major problems in the hip. The usual recommendations to modify the squat are to adjust depth or move more towards unilateral exercises (like split squat and lunge variations).

Hip IR/ER: the body needs a balance of both and should be both strong and mobile throughout both rotations.
Some strength coaches have famously denounced the bilateral squat pattern because they feel the risk vs reward does not make sense and will remove the movement all together.
I’m not there, yet! But I will say, that for the athletes I work with, they almost all have the same risk factors in common: poor ankle ROM, long femurs, and short torsos (relative to leg length). This is a recipe for hip trouble over the long term.
In these cases, I like making unilateral lower body exercises the main lift (be it as a precaution or a necessity) because it ensures we are getting a full range of motion in training the legs. Then we don’t have to rely so heavily on squatting to full-depth to get proper training effect.

The classic box squat. Easy on the knees, great way to load the hips. Might this be too much of a “good thing” over many years with little variety?
But, adjusting squat depth and favoring lower body unilateral work is certainly not a new approach.
Here’s what is: combining postural breathing exercises while encouraging the natural internal rotation of the hip. I’ve been diving in deep on using postural breathing exercises coupled with hip adduction. These positional breathing drills, which are realigning the diaphragm and the pelvis simultaneously, while also involving the adductors and even the hamstrings. The adductors themselves do not get a lot of work while squatting, and could cause an imbalance or injury if not addressed (side note: a split squat DOES heavily involve the adductors).
Pounding the adductors, hamstrings, with a simultaneous “tail tuck” and “rib tuck” through exercises relieves the hip a bit in how we then start to train the surrounding musculature. This can be quite refreshing for the athlete over time. More on these specifics next week in part 2.
But why keep chasing the squat? Why bother trying to make adjustments? Why NOT just join the group that bans this movement pattern from lifts? 1. Variety is key (I’ll touch on that later); 2. A bilateral squat is VERY functional: defensive position, anyone? Bilateral jumping is also pretty darn commonplace 3. It allows you to use more weight and thus tax the core a lot more.
Not what I’m talking about! This is bad squat IR and shows weakness and lack of control. An injury waiting to happen.
Okay, I’ve convinced myself. Let’s keep plugging away:
Most coaches when coaching the squat do not allow for natural internal rotation of the hip, true, most coaches will coach athletes to drive the knees out really hard and maybe even use a wide stance as well.
The opposite of this, and perhaps the more natural way to squat, that I’ve been experimenting with lately is this idea of not driving into so much external rotation when squatting, and allowing a little bit of natural internal rotation.
With this knee travel, the knee must remain inside the toe box and we should see this slight motion in the deeper portion of the squat or as part of a natural motion in the split squat. Again, and I can’t emphasize this enough, the knee motion is very slight, always under control, and stays within the toe box.
If you are struggling with hip pinching or catching, I recommend getting the hip looked at by a qualified medical professional who can help you understand what’s going on inside. If things are looking manageable, that’s awesome! You can train.
Please come back next week for part 2 of this post and I will share exercises ideas, specific training days, along with safe loading parameters. Getting the correct work-arounds will help you not only feel better but also feel like you are making progress once again.
Since you’re here: We have a small favor to ask! At SAPT, we are committed to sharing quality information that is both entertaining and compelling to help build better athletes. Please take a moment to share the articles on social media, engage us authors with questions and comments below, and link to articles when appropriate if you have a blog or participate on forums of related topics.
Thank you! SAPT
Developing Strength & Power in Young Athletes: Youth Speed Training Workout #001
Coach Sarah Walls shares a developmental speed training session for children that is built around fun, coordination, strength, and speed.
For children who are physically and psychologically ready, this is a great single session example workout that provides lots of opportunities to work on coordination, strength, and speed training technique:
Overhead Stick March 2x15yd
Overhead A-Skip 2x15yd
Overhead A-Run 2x15yd
Front Rack Stick March 2x15yd
Front Rack A-Skip 2x15yd
Front Rack A-Run 2x15yd
PUPP Start 2-3x 15yd
3-Point Start 2-3x 15yd
2-Point Start 2-3x 15yd
Overhead Stick Squat 2x8
Hang Snatch with Stick 2x5
A1 BW Split Squat 3x5/leg
A2 Arm Mechanics from Seated Position 3x:10
B1 Suspension Strap Row 3x10
B2 Push-up Eccentrics 3x3
C1 Conventional Deadlift Technique 3x3
The marches, skips, and stick runs in the first portion are serving to provide a thorough warm-up. It would be totally appropriate to add in other ground based warm-up exercises beforehand, too.

Keep a close eye on children’s fatigue level throughout each set and always offer plenty of opportunities to take a break or get water. For kids not used to this type of work it can be very fatiguing and they may need time to build up their work capacity. We go through the whole session at a leisurely pace and have plenty of time for laughing, joking, and questions built in.
This entire session is predicated around working on technique and I am always ready with a regression or progression in case a certain exercise is not a good fit on any given day. For this particular session, my daughter has recently grown 3/4” and was struggling with the balance for the Split Squat. So, I quickly told her we’d adjust to using body weight (instead of 10lbs) and even gave her a bit of support/assistance by letting her hold onto my arm when needed. This approach got us the good technique I was after and helped to keep her feeling successful.
The development of strength and power in youth has previously been a source of great debate, yet despite earlier misconceptions there is now a wealth of evidence supporting the use of resistance training by both children and adolescents. Conceivably, if a child is ready to engage in sport activities, then he or she is ready to participate in resistance training. -High-Performance Training for Sports
To get all the above done in one session is the result of a slow process of building. Before using something so lengthy, please make sure the children you want to use this with are ready both physically and psychologically. They should have a good work capacity and be excited to embark on this type of technique training. If they are not ready in either area, work needs to be done to get both areas improved so they will have a better experience with this type of workout.
Since you’re here: We have a small favor to ask! At SAPT, we are committed to sharing quality information that is both entertaining and compelling to help build better athletes. Please take a moment to share the articles on social media, engage us authors with questions and comments below, and link to articles when appropriate if you have a blog or participate on forums of related topics.
Thank you! SAPT
Advanced Average Joe: Wave 1
Do you train regularly and look forward all day to when you can finally get to the gym for a no-holds-barred training session? Do you already squat and deadlift regularly? Have you hit a plateau and need a little push to get over the hump? Coach Sarah Walls shares SAPT’s Advanced Average Joe training program.

Do you train regularly and look forward all day to when you can finally get to the gym for a no-holds-barred training session? Do you already squat and deadlift regularly? Have you hit a plateau and need a little push to get over the hump?
Welcome to SAPT’s Advanced Average Joe program. This program is designed for guys and gals who have a fairly solid training age (foundation) already set. It’s not a struggle for you to get to the gym because you love training. But sometimes you feel a little haphazard in your training approach.
This training program will push you past your plateau and give you a feeling of direction and real progress.
Advanced Average Joe profile:
Age: 17 - 65+
Years training: 1-2 years minimum - if you’ve been training longer, that will still be a great fit
Exercise competencies: squat, deadlift, bench press, push-up, pull-up
Injuries: none


Day 1
You will be working up to a heavy single for each exercise and then doing back-down sets at the percentage noted. This percentage is taken off the heavy single, not your all-time best squat/bench/dead number.
Notice the RPE on the single is a 9/10. Does this mean you should expect to reach failure? Absolutely not! If you reach failure or a 10/10 you have not executed the set properly. Don’t be a meathead or a hero on this. Live to train another day (and reach many more PRs in the coming weeks).
Day 2
Pay attention to the RPE note and work up to a single set on Front Squat at that RPE. This will feel good and you will want to do another set, but don’t. Stopping while you’re ahead is key.
Bench Press to 1-Board works up to another RPE of 8/10. But then you will notice a note that says “load drop 8%.” This simply means you will do another set with an 8% reduction in weight for the same number of reps.
Day 3
Speed work: you’ll be using your Competition stance (or the deadlift stance you prefer if you have not competed) and pulling a 70% working weight for all the sets. This number is coming from the weight you worked up to on Day 1.
Same goes for setting your weight for the squat.
Later on in this session you will see some exercises that have a total listed number of reps. This means you will break them into smaller sets as your strength/fitness allows on that day.
Day 4
Speed Bench Press weight will be set off of your Day 1 work. After finishing all the speed sets, you will once again work up to a heavy single. Keep it at an 8-9/10 RPE and DO NOT expect you will exceed your Monday number.
Enjoy and post questions to our comments!
Since you’re here: We have a small favor to ask! At SAPT, we are committed to sharing quality information that is both entertaining and compelling to help build better athletes. Please take a moment to share the articles on social media, engage us authors with questions and comments below, and link to articles when appropriate if you have a blog or participate on forums of related topics.
Thank you! SAPT


